Sometimes you may encounter the situation where Power Apps just could not display all the content that you want to show to users, it could be a long article like User Policy or Privacy Statement, or some multi media content you want to play, or simply a third party service you want users to access. In this case, having the option to launch a web page directly from Power Apps could be very useful.
Meanwhile, the built-in connector of sending an email using Outlook is a convenient tool to use, however sometimes your users may also want the flexibility to launch an email client, such as when they want to edit the content occasionally or they want to use another email service provider other than Outlook. This will also be covered in this post.
Open Web Pages with a Static URL
To open a web page with a static URL is rather straightforward, you can use any button, icon or even labels (yes, combined with underlined text in the label, you can give users the illusion that they are clicking on a hyperlink…LoL) and set their OnSelect property to something like this:
Launch("https://www.google.com")By default, when users click on the button or icon, there will be a new browser tab opened with the specified URL. If the user is using the mobile version, then the default browser of the mobile operating system will be launched with the desired web page displayed.
Open Web Pages with a Dynamic URL
Sometimes you may need to display different pages of a website based on the input of users, then you will need to construct a dynamic URL before passing it to the Launch function. However you need to make sure that the target website indeed can process the parameters you passed into the dynamic URL, and you need to package your URL into the correct format required by the website.
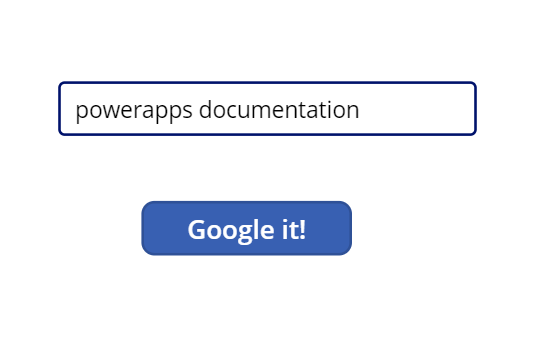
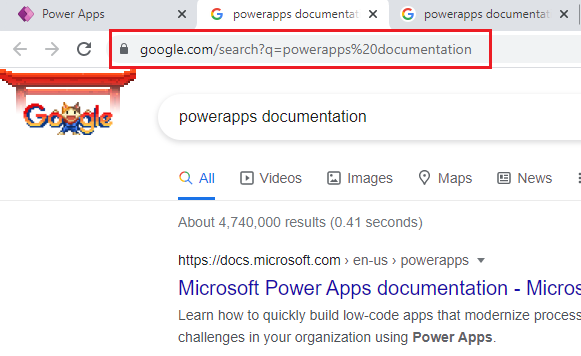
Taking Google as an example, we can use a text input to allow users to specify what they want to search in Google then pass it to Launch function.
Launch("https://www.google.com/search?q=" & TextInput.Text)

If you feel using text manipulation in constructing the dynamic URL is too messy, Power Apps also provides an elegant way to specify the parameter table in two formats
Launch("[Base URL]", "[parametername1]", [parametervalue1], "[parametername2]", [parametervalue2])or
Launch("[Base URL]", {[parametername1]:[parametervalue1], [parametername2]:[parametervalue2]})So the above example can be written as either
Launch("https://www.google.com/search", "q", TextInput.Text)or
Launch("https://www.google.com/search", {q:TextInput.Text})Launch a Desktop Email Client
Opening an email client is actually also leveraging on Launch function, which is why I combine both contents into one post. By now, you should be quite familiar with the standard way to send out emails in Power Apps. Just add the Microsoft365Outlook connector into your app, and add the email function to the OnSelect property of a button or icon, simple example like
Microsoft365Outlook.SendEmailV2("abc@xyz.com", "This is email subject", "this is email body")The problem with this method is that it sends out emails with pre-defined format using your Microsoft account’s outlook service. It does not allow users to have the flexibility to add whatever content they want to, nor does it allow users to use other email service providers.
The workaround is to use a combination of Launch function and a mailto label in HTML language.
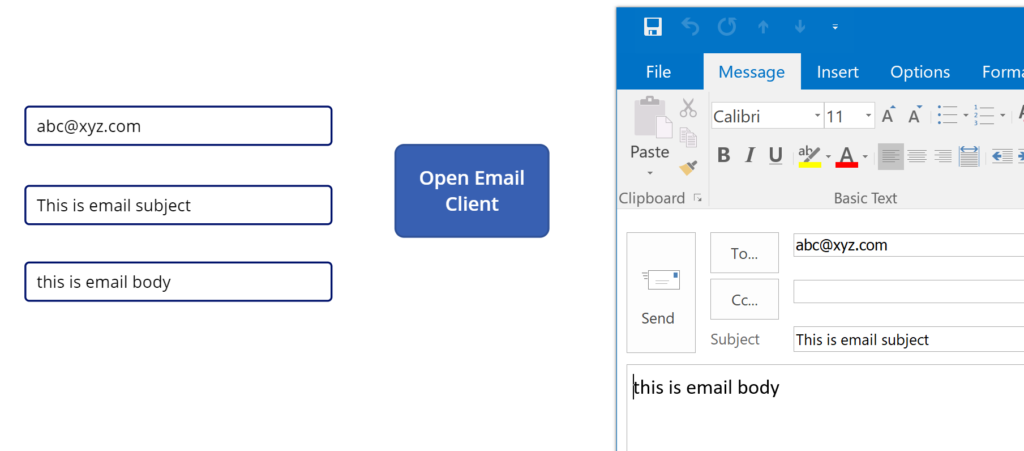
Launch("mailto:" & TextInput1.Text & "?subject=" & TextInput2.Text & "&body=" & TextInput3.Text)
After the button is activated, the default desktop email client of your operating system (Outlook, Windows Mail, Foxmail, Thunderbird, etc…if you are old enough to know them) will be launched with pre-defined content, but yet still allows users to edit before sending out.
Launch a Web Email Client
Starting from Yahoo era, web email clients are getting more and more popular due to the convenience of accessible everywhere. Because web email client is basically a web page with dynamic URL, it follows the same steps we used in the early part of this post, just remember to comply with the email service provider’s parameter set.
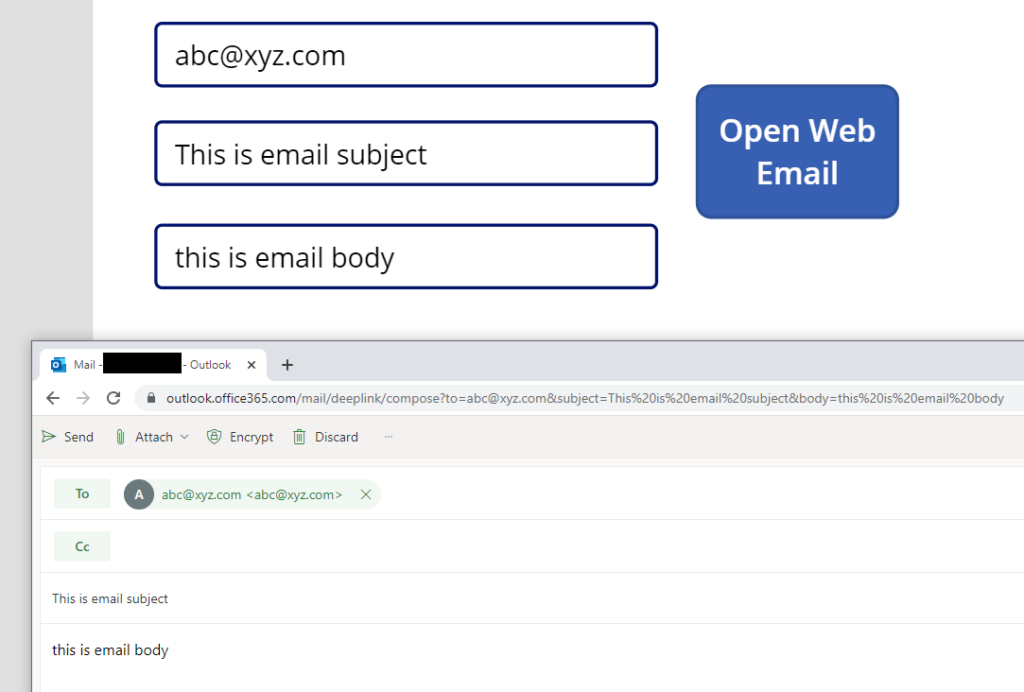
Taking Outlook Web as an example
Launch("https://outlook.office365.com/mail/deeplink/compose?to=" & TextInput1.Text & "&subject=" & TextInput2.Text & "&body=" & TextInput3.Text)