File backup is an important task we do everyday when dealing with business data, and SharePoint provides a quick and easy way to do that for every file you upload to SharePoint sites. By default, versioning is enabled for all lists and document libraries, thus whenever you make changes to a file, SharePoint will automatically retain a copy of the old file so you can always view or restore it from “Version History”.
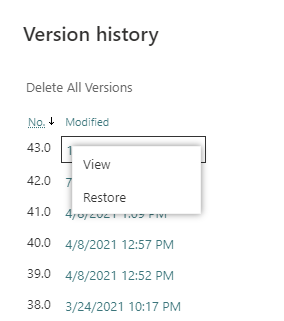
However things are getting a little tricky when you need to back up files to a different SharePoint site or a different folder of the same site. There is no ready solution provided by Microsoft but we can leverage on Power Automate to build a flow to do so automatically.
Decide frequency and naming
There are two things you need to consider before you actually start to build the flow, one is the backup frequency and the other is the naming of the backup. If you just need a monthly backup, you can name the backups as filename_YYYYMM. Or if you are dealing with highly active data and wants an hourly backup, you can consider something like filename_YYYY-MM-DD_HH-mm. Once you have made decision on these two, we can start to build the flow.
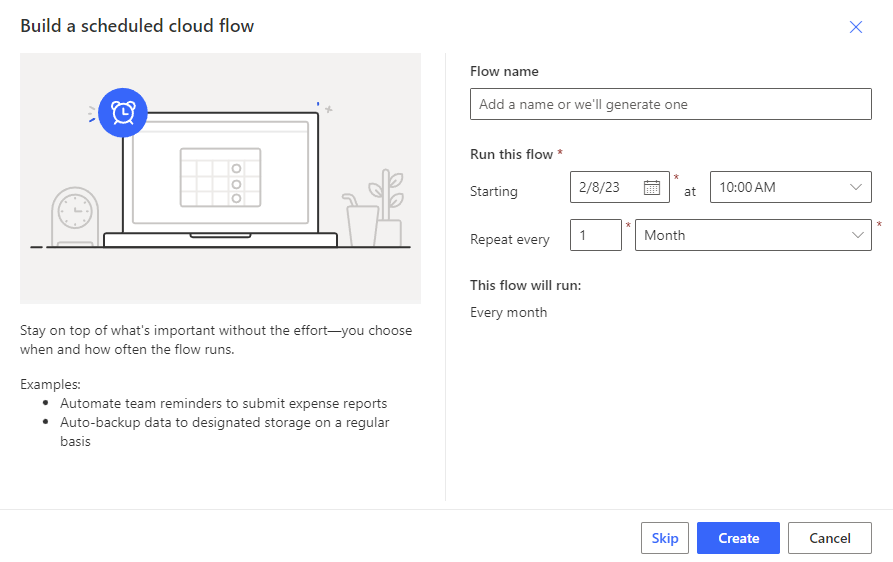
First let’s create the flow. Since this is going to be a routine job, we can create a “Scheduled Cloud Flow” in Power Automate. Choose what time the flow will be triggered and select the frequency based on your needs. If instead of a periodic run, you need to trigger the backup task based on certain conditions, you can still use “Automated Cloud Flow” with a suitable trigger.
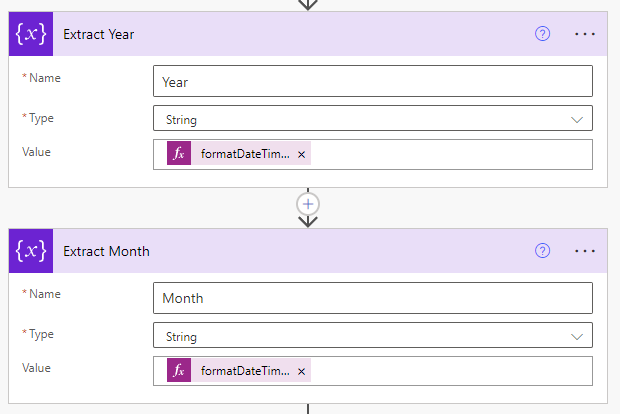
The next step is to take care of the backup naming. Because there are time elements in the backup naming format, we need to dynamically extract the correct time values when the flow is running. Use “Initialize variable” actions to extract the time values and store them as string in defined variables for later use.
To extract year value of when the flow runs, use
formatDateTime(utcNow(),'yyyy')To extract month value of when the flow runs, use
formatDateTime(utcNow(),'MM')You can name the action blocks so you know what each step is actually doing, the result should be like below:
Copy file content and name the backup
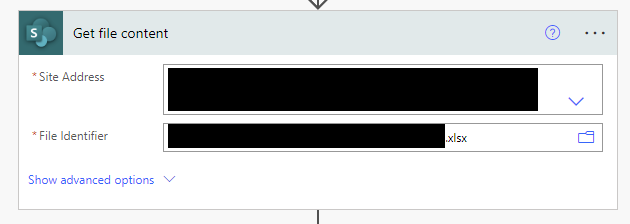
There is a SharePoint “Copy file” action in Power Automate that can allow you to copy files from one folder to another, even cross sites. But the downside is that this action does not allow you to customize the backup names. In order to achieve this, we use two steps, first to extract the file content, then to create the file with the same content but a customized name.
Use “Get file content” action to locate the source file and extract its content.
Next we use “Create file” action to create the backup file in the destination folder with the new name defined by us. The file extension must be present in the new name and identical to the source file (in demo’s case, “.xlsx”). Otherwise the backup file may not be able to open correctly.
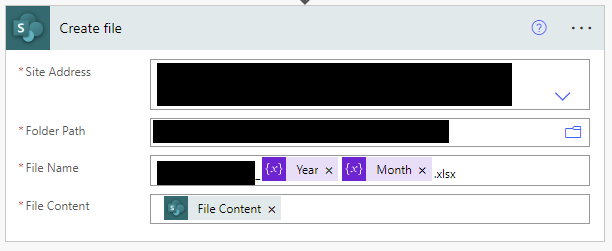
The three dynamic content elements of the above image are:
variables('Year')
variables('Month')
outputs('Get_file_content')?['body']
The complete flow should look like below:
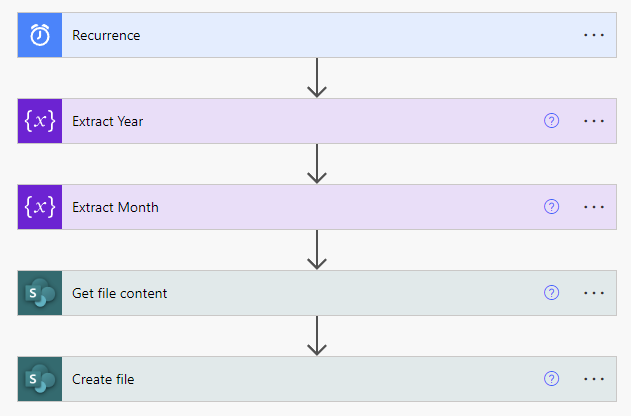
Once you understand the above concept, you can actually modify it to your different requirements by changing the last step, instead of creating a backup file in a different SharePoint site, you can also place it into your OneDrive, or send someone an email with this as attachment, etc.