As part of the user experience design, getting a real time instant response from the application interface could enforce app users’ sense of completion for their actions. Of course you can still use an email as the final confirmation on the outcome of an entire process, but for mini steps in between, a simple in-app notification could do a much better job.
In Power Apps, you can simply call the Notify function to create a customizable in-app notification. The Notify function displays a banner message to the user at the top of the screen, overlaying what is currently displayed. The notification will remain until the user dismisses it, another notification replaces it, or the timeout expires which defaults to 10 seconds.
The syntax of the function is quite simple:
Notify( MessageToDisplay, NotificationType, Timeout )MessageToDisplay is a required parameter which is a string of text that you want to show to users. NotificationType is an optional parameter with the default as NotificationType.Information. Timeout is also an optional parameter to define the number of milliseconds to wait before automatically dismissing the notification, with the default as 10,000 (equal to 10 seconds).
Let’s build a simple demo to show all 4 types of in-app notifications we can use in Power Apps.
Informational Notification
Select the screen and in its OnVisible property, write the below formula:
Notify("This is not an IQ test.", NotificationType.Information)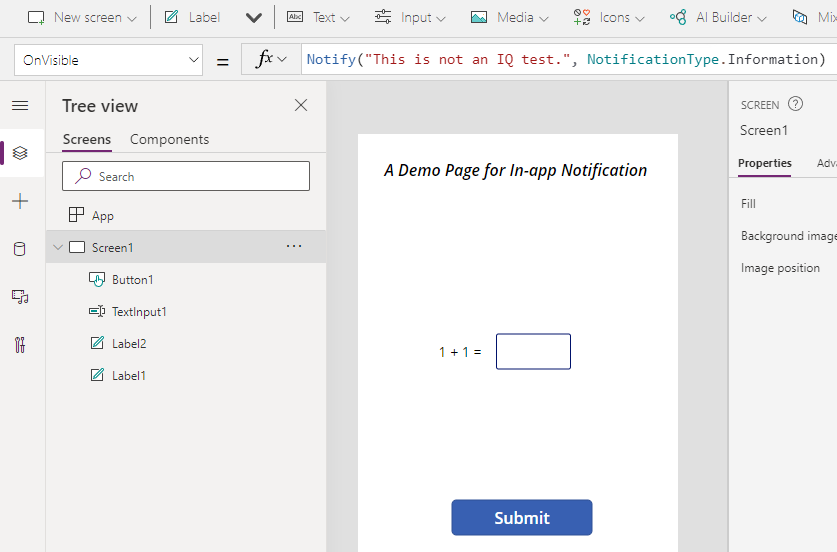
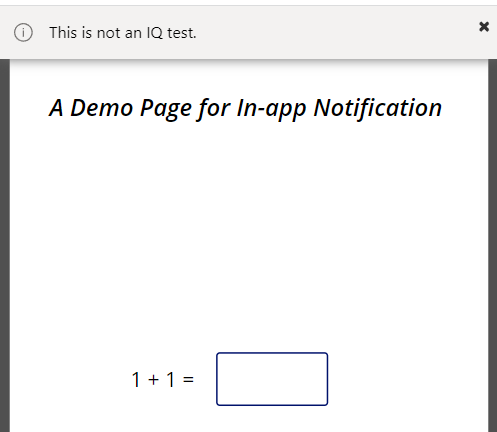
Now each time when this screen is visited by users, the message “This is not an IQ test.” will be displayed to the user as informational. It will dismiss automatically in 10 seconds (default timeout) if the user does not dismiss it.
Success Notification
Now select the “Submit” button and in its OnSelect property, write the below formula:
If(Value(TextInput1.Text) = 2, Notify("You got it right!", NotificationType.Success))
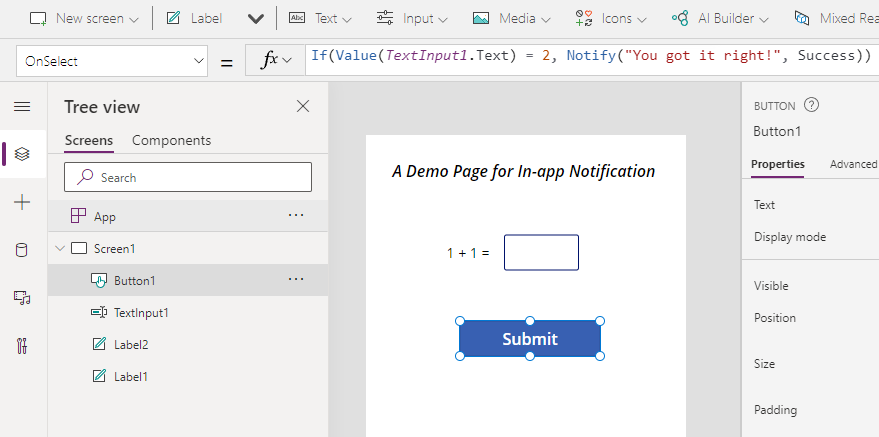
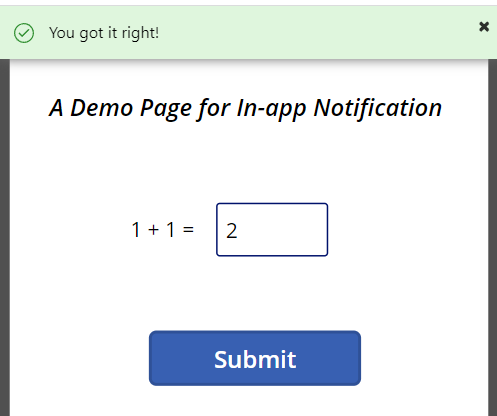
Now when you key in the correct number “2” and click “Submit” button, a success message will be displayed as a top banner.
Error Notification
Let’s add something more into the previous formula to display an error message when the user gives wrong answer:
If(Value(TextInput1.Text) = 2, Notify("You got it right!", NotificationType.Success), Notify("Your answer " & TextInput1.Text & " is not correct!", NotificationType.Error))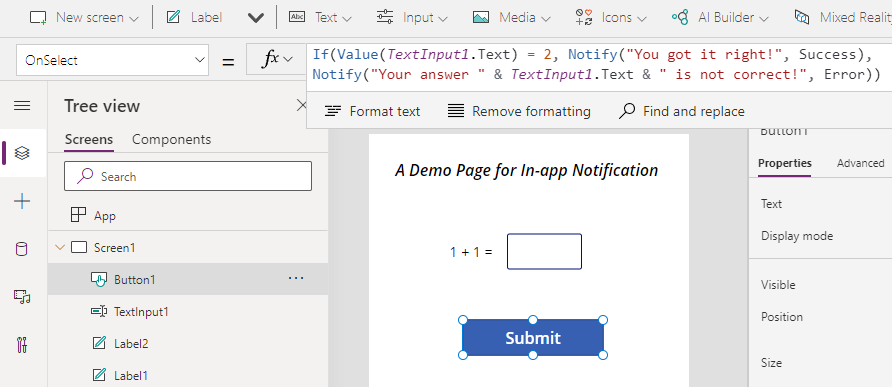
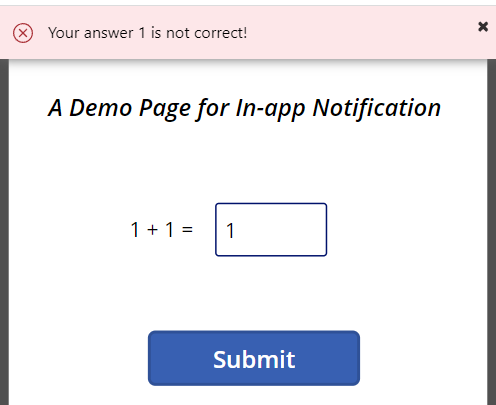
Once the user gives the wrong input and press the button, the error message will be shown. You may notice that the message can be dynamic to pull any data from the application itself, in our case, the message will display the exact wrong input user just gives.
Warning Notification
What if the user accidentally key in an alphabet instead of a number, can we warn the user? This is where a warning notification can be used. Let’s select the text input object and in its OnChange property, put below formula:
If(Not(IsNumeric(Self.Text)), Notify("Answer should be a number!", NotificationType.Warning))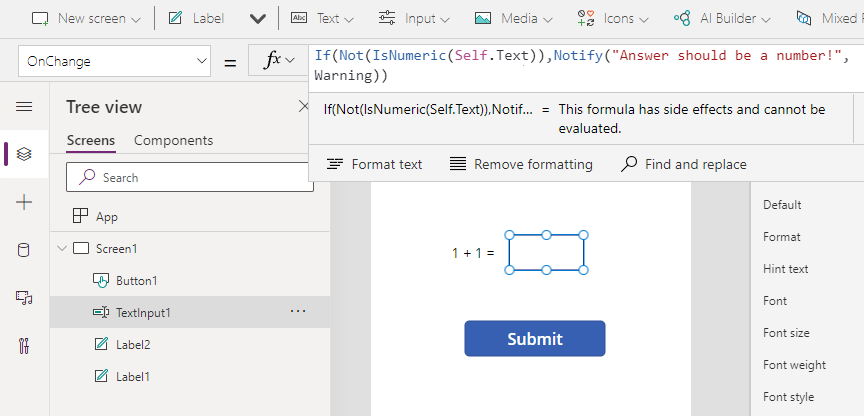
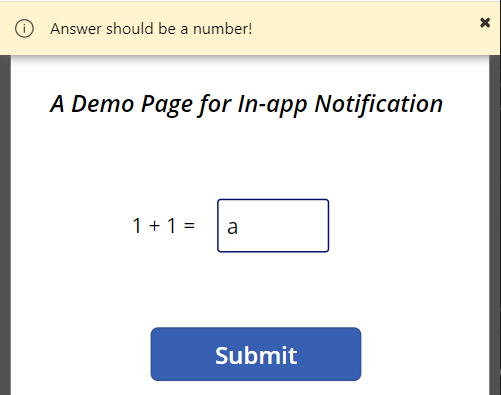
Now if the user key in a non numeric value into the input box, once he or she presses another place to finish the input of the value, the warning notification will be displayed to call for attention.
Now you know how to use different types of in-app notifications in Power Apps, you can use a combination of them to build a more interactive and responsive application for your users!